


")


A screenshot is a picture taken of whatever’s on your screen. However, today we’re going to show how to screenshot on Windows. But, if you’re taking a shot at a PC and you’re increasingly used to taking a shot at a Mac, it tends to be dubious to make sense of how to take a screenshot.
Screenshots are definitely useful, whether you are writing a how-to-guide or making a PPT training presentation for your team. So, the most straightforward approach to show someone how to accomplish something is through visual pictures, and in those cases, screenshots are your most logical option. So, Here, we’ll show you a couple of various approaches to take screenshots on various Windows versions.
Table of Contents
How to screenshot on windows:
Microsoft created a Snipping Tool specifically for capturing screenshots. And, t here are four sorts of screenshots you can take with the Snipping Tool:
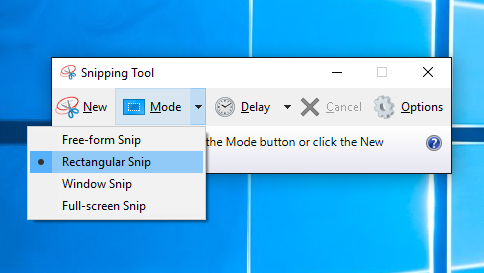
- Free-form snip: Capture a free-form screenshot around an article.
- Rectangular snip: Capture a rectangular screenshot around an article.
- Window snip: Capture a program window or dialog box.
- Full-screen snip: Capture the full screen.
When you’re done capturing a screenshot, there are a couple of things you can do with the image other than just saving it:
- Annotate it: Write or draw on the screenshot by choosing “Pen” or “Highlighter” buttons. So, Utilize the “Eraser” tool to remove lines you’ve drawn.
- Remove the URL: If you’ve taken a screenshot of a program window and saved it as a HTML, then the URL automatically appears beneath the snip. On the off chance that you don’t want this, select “Options” in your Snipping Tool, and then uncheck the “Incorporate URL underneath snips (HTML only)” box. Then, click “alright”.
- Share a snip: Select the arrow beside “Send Snip”, and then select an option from the rundown to share your screenshot.
Now, how about we take a look at the basics of capturing a screenshot on Windows 7, 8.1, or 10.
Step 1: Open your Snipping Tool. However, For Windows 7 and 10, select “Start” and type “snipping tool” into the search box, and then select the tool from the outcomes. Also, For Windows 8.1 and Windows RT 8.1, swipe from the correct edge of your screen, select “Search” and type “snipping tool” into the search box, and select the tool from the outcomes.
Step 2: Within the Snipping Tool, click “Mode” and then select the sort of snip you want. Then, select the area of your screen you want to capture.
Step 3: After you capture your snip, select the “Save Snip” button. Type a document name, location, and type, and then snap “Save”.
How to take a screenshot of your active window:
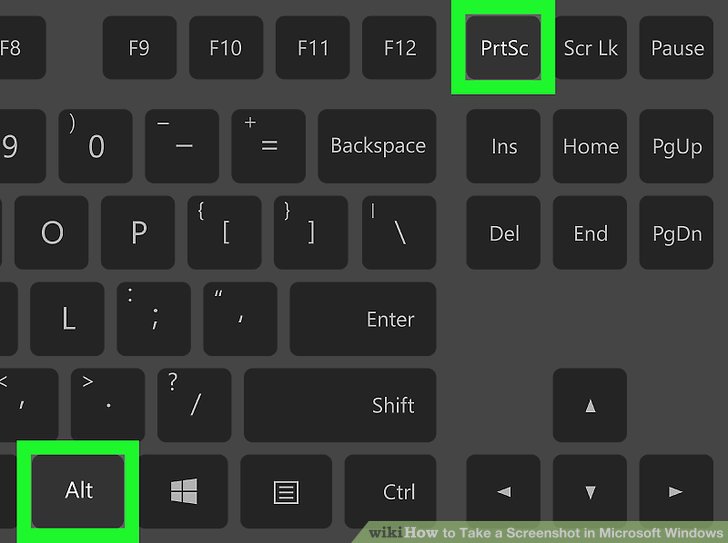
However, there’s an easy route to the above procedure if you want to take a screenshot of your present active window. So simply press “Alt” + “PrtScn”. Your active window will be captured, however it won’t automatically save – to do this, discover the screenshot in your clipboard, open an image editor, and save it from that point.
How to take a screenshot of your whole screen on Windows:
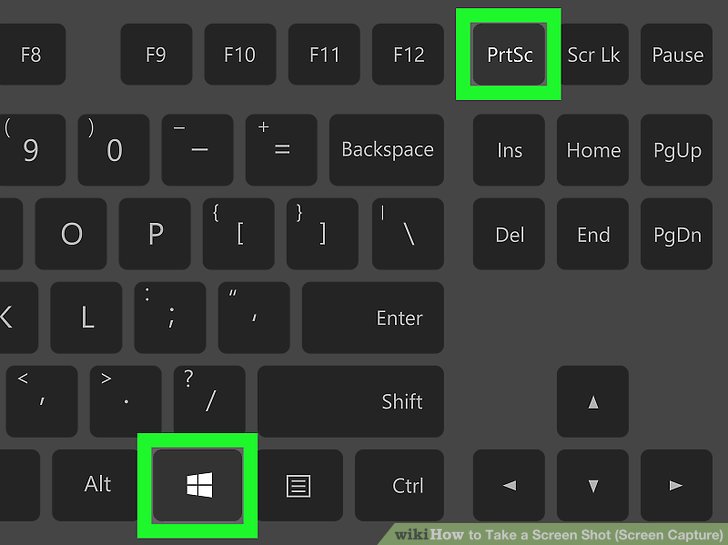
If you want to take a screenshot of your whole screen and save the screenshot automatically, then hit the “Windows Key” + “PrtScn”.
Your screen should diminish for a minute, and then the screenshot will be saved in Pictures > Screenshots folder.


